Showing posts with label Labs and Activities. Show all posts

Monday, June 29, 2009

Food Labs (Biochemistry)


Biological macromolecules like proteins, lipids (fats), and carbohydrates (sugars and starches)
are the building blocks of living cells. They also use them to store energy. This week, for biology, we made food samples, and tested them for fat and starch. Here is how we did it:


Fat Test
For the fat test, we tested samples of milk, butter, peanut butter, olive oil, Nutella, egg whites, an egg yolk, heavy cream, sunflower seeds, sesame seeds and yogurt. We also used water for the control sample. We tested them by taking a big piece of brown paper-bag-type paper, drawing squares for the samples, and spreading a little of each food in its square. We than waited for around 15 minutes for the food samples to dry. Once dry, any sample containing fat left a dark grease stain on the paper.


Starch Test
The starch test was slightly more complicated. For the starch test, we made samples of cooked pasta, bread, crackers, a blue chip, flour, a potato, sugar, corn starch. Again, we used water as a control. For the set-up, we took a small sample of each food, and put it in a small plastic cup. For the testing, we put a few drops of iodine on the sample. If the sample contained starch, the drops turned blue. This is because (from Wikipedia) "Starch forms an unstable complex (blue colored) in low concentrations of Iodine."


The potato after the Iodine was added.
As it's reacting with the starch,
the brown Iodine turns dark blue.


The sugar after the Iodine was added.
As you can see, the Iodine did not change color,
meaning that the sugar contains no starch.


One of the cracker samples we made after the iodine was added.
This sample has water added because we were trying to contrast it
with a cracker sample that we chewed up. The starch in the chewed-up
sample was supposed to convert to sugar via the enzymes in our saliva.
Unfortunately, we were unable to detect any difference
between the chewed-up sample and the regular sample.


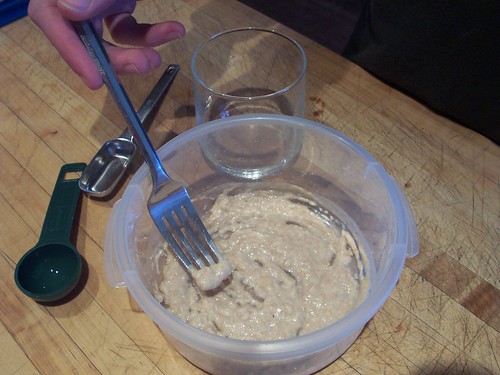
A couple of days earlier, we made butter from heavy cream. All we did was put about half a cup of cream and a pinch of salt in a glass jar and shake it for roughly 15 minutes. First the cream became thick like whipped cream, then it separated into "buttermilk" and butter.

We followed these directions from Raft.net, which contain a simple explanation of what's happening. A more detailed chemical explanation is available at Butter Through the Ages.

Resources:

SEP: Testing for Lipids, Proteins and Carbohydrates
http://seplessons.ucsf.edu/node/362


Protein, Carbohydrate, Lipid Power Point http://teacher.edmonds.wednet.edu/mths/awelman/index.php?section=documents


Virtual Protein, Carbohydrate, Lipid Lab Tests
http://faculty.kirkwood.edu/apeterk/learningobjects/biologylabs.htm


Home Training Tools Food Lab
http://www.hometrainingtools.com/food-chemistry-projects/a/1591/


Tuesday, June 9, 2009

What's Living in Our Compost Tube?


We haven't observed any change in temperature, but the food scraps in our compost tube are definitely starting to rot. And things are growing: above, looking down the neck of the soda bottle, you can see an onion sprouting up from the pile. We also took a sample of the water which collects in the bottom of the tube and took a look under the microscope. Check out the videos below:


Here you can see some of the microorganisms living in our compost pile at 40X magnification, shot with a small hand-held digital camera. The worm above is called a nematode. Cornell's Department of Crop and Soil Science has a page about compost inhabitants. They also have an online guide called Composting in the Classroom: Scientific Inquiry for High School Students which we haven't checked out yet but will.


Above is a 400X magnification of the kidney-shaped organisms, which are probably protozoa. Here's a page about Microbial Decomposers, with microphotos, from the city of Euless, Texas.

Tuesday, June 2, 2009

Soda Bottle Compost

This week, we did another experiment having to do with bacteria and other microbes: a compost column. The purpose being to show how microbes in the soil break down old plants and turn it into fertilizer. A regular compost pile, like the one by our backyard vegetable garden, is made up of old leaves and grass cuttings. The documentary "Unseen Life on Earth" mentioned a town that was using a compost pile as its trash pile by burying it in microbe-rich soil. It could decompose all the trash in a couple of years and got up to temperatures of about 140 degrees Fahrenheit.


For our compost tube, we took some old soda bottles, cut them up to make the column, put food scraps in it, and left it for a few days to decompose. We changed the directions a little, but here is the link to the original instructions.

· 2 clear, plastic, 2-liter soda bottles, one with a cap

· Nylon netting or pantyhose

· Rubber band

· Push pin

· Metal skewer or nail

· Wide packing or masking tape

· Coffee filter - basket type

· Scissors and/or box cutter

· Soil

· Vegetable and fruit scraps

· Meat thermometer

· Waterproof marking pen

1. Rinse the soda bottles. Cut the first bottle around the middle. Set the bottom half aside.

2. Take the top half of the bottle and cut again where it widens out. DO NOT CUT ALL THE WAY AROUND. Leave a flap that will act as a hinge, so you can open the top. Set aside.

3. Cut the bottom off the second bottle just above the curve. Discard the bottom.

4. Wrap the netting over the mouth of the bottle and fasten it below the neck with the rubber band.

5. Poke a hole in the top of the cap with the skewer or nail. If you heat the skewer over the stove you can melt a hole through the cap. Make it big enough to slip in the meat thermometer.

6. With the push pin, poke holes in the second bottle all around the sides to allow air to flow into the column. Do the same with with the top of the first bottle.

7. Take the second bottle with the netting and set it upside-down inside the bottom of the first bottle. Place a coffee filter inside the upside-down bottle so it covers the opening.

8. Fit the top of the first bottle inside the upside-down bottle so they form a long column. You may need to cut small V-shapes in the edge of the inner bottle so it lies flat. Use clear packing tape inside and out to fasten the two bottles together. You may need to re-open some of the holes with the push pin.

9. Bend back the hinged top of the uppermost bottle. Fill the column with fruit and vegetable scraps. You can add any plant matter, including leaves from houseplants. Sprinkle some soil over the scraps, and shake or poke down so it’s evenly mixed. If it’s dry, add some water.

10. Close the hinged top and fasten with tape. Screw on the cap. Insert the meat thermometer. Mark the height of the material in the column with the pen, and write down the date.

11. Put the compost column in a place where it can be observed for several weeks without smelling up the house. Check it regularly to see if the height or temperature changes and to see what is happening to the plant material inside.

Tuesday, May 26, 2009

Growing Bacteria Cultures

The ingredients and the bacterial smear of the window.

We tried a couple of formulas for homemade growth medium in which we could grow bacteria cultures. In real labs, a vegetable product called agar is used to make a gel. The agar is melted and poured into Petri dishes, and then chilled until it solidifies again. To get bacteria samples, a sterile cotton swab is rubbed across a surface. Then the dish is streaked by rubbing the swab in a zigzag pattern across the agar. It is set aside in a warm place and allowed to grow for several days.

The first formula was from The Science of Life by Frank G. Bottone, Jr. It used combined flavored Jello and SlimFast diet drink. Instead of Petri dishes, we used small plastic cups (the kind they put ketchup in at fast food places) covered with clear plastic wrap held on with a rubber band. For the sterile swabs, we took Q-Tips and dipped them in a cup of boiling water. Sadly, this formula grew mold but no bacteria.


Stirring the gelatin.

We had better luck with the second formula. It came from a website called Science in the Real World and was designed by biologist Teresa Thiel of the University of Missouri. It used unflavored gelatin, beef boullion cubes and sugar. We used bacteria from yogurt, a toilet, the stem of our hydroponic tomato plant, the inside of one of our mouths, the inside of our refrigerator, the inside of our fish tank, a window, the inside of one of our navels, some dirt from our back yard, the kitchen counter, a sock, and one of our fingers.

The naval smear and the finger smear at 7 days.


The dirt smear after 2 days and after 7 days. The fuzz on the right is mold.

The plant smear and window smear (see top) at 7 days.

At the end of the week, we're going to dispose of the smears and bleach out the box so that any possible escaped bacteria won't start infecting our house.

Saturday, May 23, 2009

Yogurt


This week for Biology, we made yogurt using a bacterial process. The bacteria ferments the yogurt by converting milk sugar to lactic acid. We used store-bought yogurt as starter to introduce the bacteria into the milk. The milk is heated to kill off bad bacteria and to alter the proteins to give it a better consistency.


There isn't much to do for this experiment so the instructions are in the photo captions.
Source: New York Times. You can also read more about the biology of yogurt making here.


The Ingredients: All you need is some yogurt, milk, a closed container, something to keep it warm, and a candy thermometer.


Put 3 1/2 cups of milk in a pan and heat.


The milk's temperature being tested. You want it to go up to 180 degrees.


Then put the pan inside a larger pan filled with cold water. Cool the milk down to 120 degrees.


The yogurt being poured into the container -- a quart-sized travel mug.
You want to mix in about about 2 tablespoons of yogurt to one quart or less milk.


Keep the container warm for about 12 hours. We put ours in an insulated lunch cooler.
When it's done, put it in the refrigerator. Homemade yogurt will keep for one week. Enjoy!

Sunday, May 17, 2009

Science in the Real World: Microbes in Action

activities

The Science in the Real World: Microbes in Action website is a resource for K-12 teachers. It has classroom activities for all levels, which look easy to do and use readily available materials, as well as tips and techniques for preparing baterial cultures. We're going to try preparing petri dishes using "agar" made from gelatin and beef bullion this week. (So far we haven't gotten any growth on dishes we made last week using a recipe of flavored Jello and Slim Fast...)

The website comes from the University of Missouri in St. Louis.

Monday, May 11, 2009

Cells


This week, for biology, we learned about cells. We have been watching some of the videos here, and we watched two movies about cell death (Death By Design and The Life and Times of Life and Times, as mentioned in the previous post.) We decided to look at some different things under our microscope.

First, we looked at an onion skin. We took two pieces from the bottom layer of an onion, and we put them on two different slides. With one, we put some Iodine on the slide so we could see the different layers, and the other we didn't use Iodine on. Here are some of the pictures we took:


The slide without Iodine at x100


The slide with Iodine at x100


Onion Cell Lab Instructions.

  1. Add 2 drops of iodine to the center of a glass slide. Be careful! Iodine can stain your clothes.
  2. Take a small piece of onion. Use tweezers to peel off the skin from the underside (the rough, white side) of the onion. Throw the rest of the onion piece away.
  3. Carefully lay the onion skin flat in the center of the slide on top of the iodine.
  4. Add 2 drops of iodine to the top of the onion skin.
  5. Stand a thin glass cover slip on its edge near the onion skin, next to the drop of iodine.
  6. Slowly lower the other side of the cover slip until it covers the onion skin completely. If there are air bubbles, gently tap on the glass to “chase” them out.
The second lab we did was our fishtank plants. Having two tanks we took a sample from both, it was quite simple to set up, we merely put a small leaf with a couple drops of water on a slide. Photos below:


Leaf cell plant at x400


Leaf at x40

Plant Cell Lab Instructions

  1. Tear off one small leaf/stem from the plants in the fish tank.
  2. Add one drop of tap water to the slide.
  3. Stand a thin glass cover slip on its edge near the leaf, next to the drop of water.
  4. Slowly lower the other side of the cover slip until it covers the leaf completely. Make sure there are no air bubbles.
The last lab we did was human skin cells. This was an interesting lab to do, we looked at three different samples of cheek cells, though there wasn't much difference between the cells. Photo:


The cheek cells at x400

Human Cheek Cell Lab Instructions

  1. Add one drop of methylene blue to the middle of a clean slide. Be careful! Methylene blue will stain your clothes and skin.
  2. Use the flat side of a toothpick to gently scratch the inside of your cheek. DO NOT GOUGE YOUR CHEEK - you don’t need chunks of skin and definitely don’t want to draw blood.
  3. Gently touch the toothpick to the drop of dye on the slide. Some of your cheek cells should drift off into the dye.
  4. Throw the toothpick away.
  5. Stand a thin glass cover slip on its edge near the drop of dye.
  6. Slowly lower the other side of the cover slip until it covers the dye completely. Make sure there are no air bubbles.

Links:
My Science Box (Source of experiments)


Monday, April 20, 2009

Capturing wild yeast to make sourdough bread


The yeast starter The finished loaves

Last week, we were trying out a yeast experiment that didn't work out in time for the post, but this week we have successfully finished the project: making sourdough bread using home-grown yeast.

Growing Yeast (Or "Starter")
Source: Recipe Zaar

Ingredients:
1/2 cup unsweetened pineapple juice
1/2 cup whole wheat flour
1 cup unbleached all-purpose flour
2 cups water

DAY ONE: Mix 2 Tablespoons flour and 2 Tablespoons pineapple juice. Stir well, cover and let sit for 24 hours at room temperature.


DAY TWO: Add 2 Tablespoons flour and 2 Tablespoons pineapple juice. Stir well, cover and let sit another 24 hours at room temperature. We started to see bubbles.

DAY THREE: Add 2 Tablespoons flour and 2 Tablespoons pineapple juice. Stir well and let sit 24 hours at room temperature.

DAY FOUR: Stir mixture and measure out 1/4 cup--discard the rest. To the 1/4 cup, stir in 1/4 cup flour and 1/4 cup water. Let sit 24 hours at room temperature.

REPEAT Day Four until mixture expands to double its size and smells yeasty.


The starter being poured into a bowl

Updated: Kathy's Foolproof (!) Whole Wheat Sourdough Recipe
To make a loaf for supper, I make the sponge the night before, make the dough after breakfast, shape the loaf after lunch and turn on the oven to bake the bread (no preheating) about 35 minutes before I need to start making supper. Then I use the hot oven for whatever I'm making that night.

Ingredients:
3 cups of sponge (proofed starter)
1 cup whole wheat flour
2 cups white flour (less or more as needed)
4 teaspoons of sugar
2 teaspoons of salt
1 tablespoon of olive oil
  1. To make the sponge, add one cup water and one cup whole wheat flour to starter in large bowl. Let sit out overnight (or at least 2 hours). If you use a glass bowl, you can check that it is bubbly all the way through.
  2. Measure out the sponge for the bread into a large mixing bowl. Take the leftover starter and add one cup water and one cup flour. Mix, cover, and return to the refrigerator.
  3. Take the sponge for the bread and add the sugar and salt. Mix well, then knead in the flour a half-cup at a time. Knead in enough flour to make a good, flexible bread dough. The dough should stretch, not tear, when you fold it.
  4. Pour oil into bowl. Put dough in bowl and turn until covered in oil. Let rise, loosely covered, in a warm place (like an oven heated for 1-2 minutes) for ~3 hours, or until doubled.
  5. Place dough on baking tray. Gently knead and shape into a loaf. Make three gashes across the top. Let rise again, loosely covered, 2-3 hours.
  6. Remove covering on loaf. Sprinkle with water. (This makes the crust crispy.) Turn oven on to 425 degrees F. (No preheating needed.) Bake about 35 minutes, or until brown and fragrant. Loaf should sound "hollow" when tapped on bottom.
NOTE: If you don't use your refrigerated starter in about a week you will need to feed it. Remove one cup of starter (you can use it for waffles!), add one half cup each water and flour, mix, and return to fridge for a week. Continue indefinitely.

ALSO NOTE: The liquid that sometimes separates out is called hootch, and smells like it! Just stir it back in.

The two loaves made on our second try. (Ready to go into the oven.)

Some links we used:

Breadtopia video
Microbiologist Debra Wink's sourdough experiment
Sourdough use and maintenance tips from King Arthur flour
Sourdough basics by S. John Ross

Tuesday, April 14, 2009

Root Beer

This week for chemistry, we decided to make root beer (To learn about yeast.) We used the yeast to carbonate the soda, and we more or less followed the instructions on this site
We actually made two bottles using different methods. Here are the two methods we used:


The flavoring syrup

Bottle #1

For this one, we took all the ingredients in the original instructions, but we dissolved the sugar on the stove until it was a syrup, than we mixed the rest of the ingredients (plus a packet of Maltodextrin To make it thicker) into the syrup, and poured the syrup into the bottle along with about a liter of water.


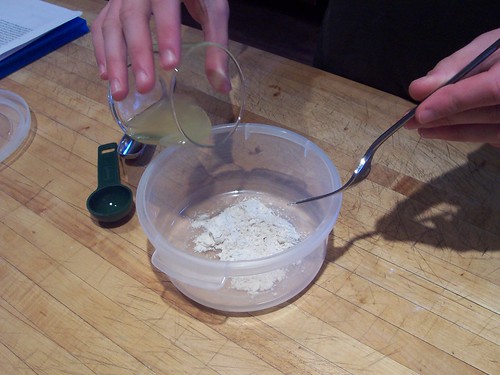
The flavoring being poured into the bottle

Bottle #2
For this bottle we pretty much followed the instructions on the website. Also, we didn't add any Maltodextrin.


A glass of the finished project