We haven't observed any change in temperature, but the food scraps in our compost tube are definitely starting to rot. And things are growing: above, looking down the neck of the soda bottle, you can see an onion sprouting up from the pile. We also took a sample of the water which collects in the bottom of the tube and took a look under the microscope. Check out the videos below:
Here you can see some of the microorganisms living in our compost pile at 40X magnification, shot with a small hand-held digital camera. The worm above is called a nematode. Cornell's Department of Crop and Soil Science has a page about compost inhabitants. They also have an online guide called Composting in the Classroom: Scientific Inquiry for High School Students which we haven't checked out yet but will.
Above is a 400X magnification of the kidney-shaped organisms, which are probably protozoa. Here's a page about Microbial Decomposers, with microphotos, from the city of Euless, Texas.
Showing posts with label Microscopes and Microphotography. Show all posts
Tuesday, June 9, 2009
Monday, May 11, 2009
Cells
This week, for biology, we learned about cells. We have been watching some of the videos here, and we watched two movies about cell death (Death By Design and The Life and Times of Life and Times, as mentioned in the previous post.) We decided to look at some different things under our microscope.
First, we looked at an onion skin. We took two pieces from the bottom layer of an onion, and we put them on two different slides. With one, we put some Iodine on the slide so we could see the different layers, and the other we didn't use Iodine on. Here are some of the pictures we took:

The slide without Iodine at x100

The slide with Iodine at x100
Onion Cell Lab Instructions.
- Add 2 drops of iodine to the center of a glass slide. Be careful! Iodine can stain your clothes.
- Take a small piece of onion. Use tweezers to peel off the skin from the underside (the rough, white side) of the onion. Throw the rest of the onion piece away.
- Carefully lay the onion skin flat in the center of the slide on top of the iodine.
- Add 2 drops of iodine to the top of the onion skin.
- Stand a thin glass cover slip on its edge near the onion skin, next to the drop of iodine.
- Slowly lower the other side of the cover slip until it covers the onion skin completely. If there are air bubbles, gently tap on the glass to “chase” them out.

Leaf cell plant at x400

Leaf at x40
Plant Cell Lab Instructions
- Tear off one small leaf/stem from the plants in the fish tank.
- Add one drop of tap water to the slide.
- Stand a thin glass cover slip on its edge near the leaf, next to the drop of water.
- Slowly lower the other side of the cover slip until it covers the leaf completely. Make sure there are no air bubbles.
Human Cheek Cell Lab Instructions
- Add one drop of methylene blue to the middle of a clean slide. Be careful! Methylene blue will stain your clothes and skin.
- Use the flat side of a toothpick to gently scratch the inside of your cheek. DO NOT GOUGE YOUR CHEEK - you don’t need chunks of skin and definitely don’t want to draw blood.
- Gently touch the toothpick to the drop of dye on the slide. Some of your cheek cells should drift off into the dye.
- Throw the toothpick away.
- Stand a thin glass cover slip on its edge near the drop of dye.
- Slowly lower the other side of the cover slip until it covers the dye completely. Make sure there are no air bubbles.
My Science Box (Source of experiments)
Monday, December 1, 2008
Micronaturalist's Notebook

Being into microphotography, I am planning on taking a closer look at the MicroNaturalist’s Notebook by award-winning biological photographer, Bruce J. Russell.
Image courtesy of BioMEDIA ASSOCIATES

Saturday, November 22, 2008

The Olympus BioScapes Digital Imaging Competition recognizes outstanding images of life science specimens captured through light microscopes, using any magnification, any illumination technique and any brand of equipment.
Images are judged based on the following criteria:
- Science - Uniqueness of the specimen or processes shown, importance of work, new information revealed, "story" told.
- Aesthetics - Beauty or impact of the image, balance, composition.
- Technical merit - Challenge of specimen itself - difficulty of capturing structures or data shown, photographic excellence.
BioScapes Museum Tour Schedules |
March 1, 2008 - May 30, 2008 - DaVinci Science Center, Allentown, PA (2006 Tour) |
March 17, 2008 - May 9, 2008 - University of Rochester Med Ctr, Rochester, NY (2007 Tour) |
April 7, 2008 - July 1, 2008 - St.Louis Museum of Science, St.Louis, MO (2005 Tour) |
May 19, 2008 - July 25, 2008 - MBL, Woods Hole, MA (2007 Tour) |
June 2, 2008 - August 29, 2008 - Maryland Science Center, Baltimore, MD (2006 Tour) |
July 7, 2008 - October 1, 2008 - Dallas Science Center, Dallas, TX (2005 Tour) |
August 1, 2008 - October 31, 2008 - NY Hall of Science, New York, NY (2007 Tour) |
November 1, 2008 - December 21, 2008 - San Diego Science Center, San Diego, CA (2007 Tour) |
Saturday, November 1, 2008
Microphotography (and Photomicrography)
I can't believe I forgot to cross post this really cool How-To I wrote for Wired.com on taking photographs with your microscope! (There's also a related GeekDad post with some helpful links.) It spawned an email argument with a reader over the proper term; here's what Wikipedia says:
A micrograph, microphotograph or photomicrograph is a photograph or similar image taken through a microscope or similar device to show a magnified image of an item.
We'll be doing a lot more of this, whatever you want to call it, in the near future. We're still trying to find out exactly what the wiggly guy up top is.
Wednesday, October 1, 2008
Bryozoa (not aliens)

Recently we got one from our local canal to study, though we had some trouble getting it out. We had to find one that was small enough to fit in our jar, and close enough to shore to reach. (We didn't know how deep the canal was!) The colony we picked was one of two attached to a loose branch that we were able to pull on shore. Then we had to break it off to fit it in the jar. (Mom forgot her Swiss Army knife.) We made sure to fill up the jar with the water it came out of -- plus an extra container -- and carried it home carefully.
Up close, we could see that the pod was made up of clear jelly-like substance with spots all over the surface. The next day we took samples from our jar and looked at them under the microscope. First we looked at some jelly that was stuck to the stick, where the larger colony broke off. It was yellow and cloudy, but we couldn't see anything moving or otherwise interesting.
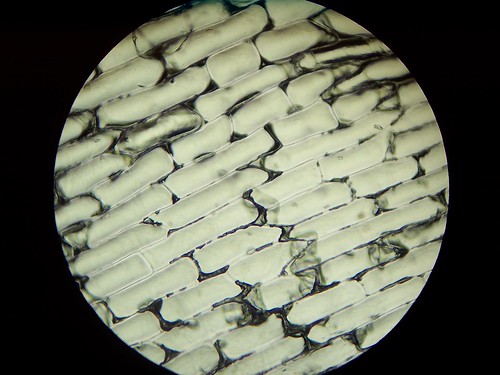
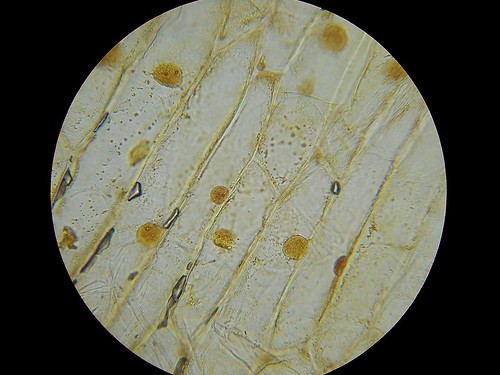
Then we used a pipette to suck up one of the small, dark green dots around the edge of the jar. (See slide on left.) Under the microscope we could see a dark center, a lighter ring, and little hooked feet sticking out all around. (Closeup on right.) This is a statoblast, which is used by the Bryozoa for reproduction. The statoblast can survive the winter and grow a new colony in the spring. According to this site, the jelly and everyone attached dissolves in cold water.
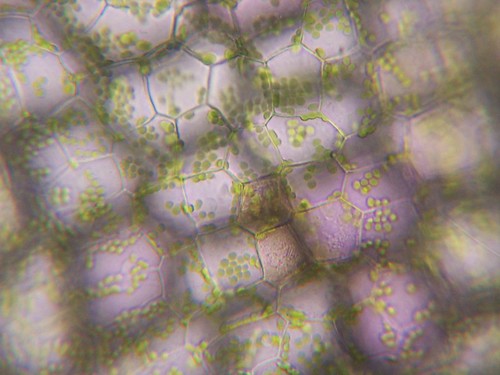
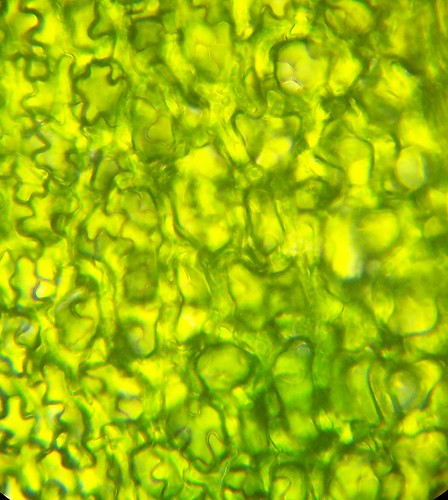
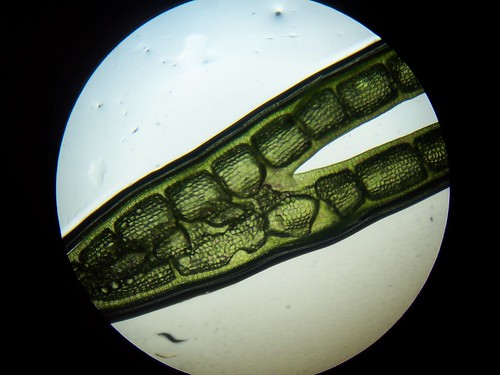
We also took scrapings from the pod itself. We saw all kinds of things moving around. Here are some of them:
We're wondering if the yellow things in the middle are the actual polyps. Here is a website with great microscopic photos and videos of Pectinatella magnifica. What do you think?
Subscribe to:
Posts (Atom)