Showing posts with label Microbiology. Show all posts

Tuesday, June 2, 2009

Soda Bottle Compost

This week, we did another experiment having to do with bacteria and other microbes: a compost column. The purpose being to show how microbes in the soil break down old plants and turn it into fertilizer. A regular compost pile, like the one by our backyard vegetable garden, is made up of old leaves and grass cuttings. The documentary "Unseen Life on Earth" mentioned a town that was using a compost pile as its trash pile by burying it in microbe-rich soil. It could decompose all the trash in a couple of years and got up to temperatures of about 140 degrees Fahrenheit.


For our compost tube, we took some old soda bottles, cut them up to make the column, put food scraps in it, and left it for a few days to decompose. We changed the directions a little, but here is the link to the original instructions.

· 2 clear, plastic, 2-liter soda bottles, one with a cap

· Nylon netting or pantyhose

· Rubber band

· Push pin

· Metal skewer or nail

· Wide packing or masking tape

· Coffee filter - basket type

· Scissors and/or box cutter

· Soil

· Vegetable and fruit scraps

· Meat thermometer

· Waterproof marking pen

1. Rinse the soda bottles. Cut the first bottle around the middle. Set the bottom half aside.

2. Take the top half of the bottle and cut again where it widens out. DO NOT CUT ALL THE WAY AROUND. Leave a flap that will act as a hinge, so you can open the top. Set aside.

3. Cut the bottom off the second bottle just above the curve. Discard the bottom.

4. Wrap the netting over the mouth of the bottle and fasten it below the neck with the rubber band.

5. Poke a hole in the top of the cap with the skewer or nail. If you heat the skewer over the stove you can melt a hole through the cap. Make it big enough to slip in the meat thermometer.

6. With the push pin, poke holes in the second bottle all around the sides to allow air to flow into the column. Do the same with with the top of the first bottle.

7. Take the second bottle with the netting and set it upside-down inside the bottom of the first bottle. Place a coffee filter inside the upside-down bottle so it covers the opening.

8. Fit the top of the first bottle inside the upside-down bottle so they form a long column. You may need to cut small V-shapes in the edge of the inner bottle so it lies flat. Use clear packing tape inside and out to fasten the two bottles together. You may need to re-open some of the holes with the push pin.

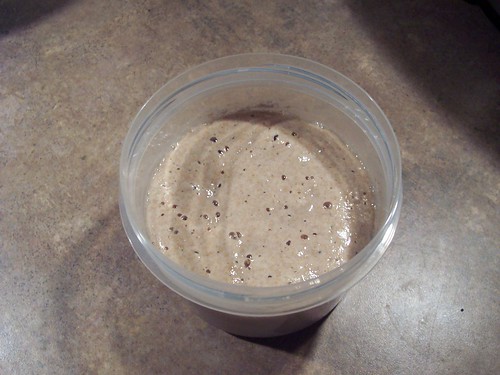
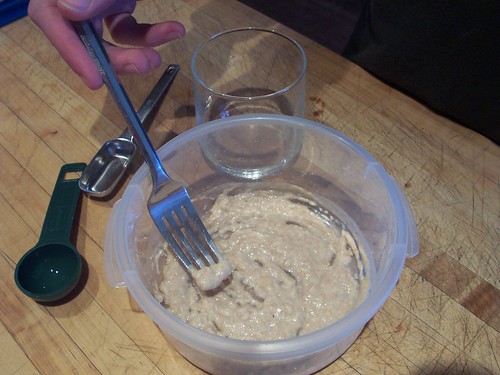
9. Bend back the hinged top of the uppermost bottle. Fill the column with fruit and vegetable scraps. You can add any plant matter, including leaves from houseplants. Sprinkle some soil over the scraps, and shake or poke down so it’s evenly mixed. If it’s dry, add some water.

10. Close the hinged top and fasten with tape. Screw on the cap. Insert the meat thermometer. Mark the height of the material in the column with the pen, and write down the date.

11. Put the compost column in a place where it can be observed for several weeks without smelling up the house. Check it regularly to see if the height or temperature changes and to see what is happening to the plant material inside.

Tuesday, May 26, 2009

Growing Bacteria Cultures

The ingredients and the bacterial smear of the window.

We tried a couple of formulas for homemade growth medium in which we could grow bacteria cultures. In real labs, a vegetable product called agar is used to make a gel. The agar is melted and poured into Petri dishes, and then chilled until it solidifies again. To get bacteria samples, a sterile cotton swab is rubbed across a surface. Then the dish is streaked by rubbing the swab in a zigzag pattern across the agar. It is set aside in a warm place and allowed to grow for several days.

The first formula was from The Science of Life by Frank G. Bottone, Jr. It used combined flavored Jello and SlimFast diet drink. Instead of Petri dishes, we used small plastic cups (the kind they put ketchup in at fast food places) covered with clear plastic wrap held on with a rubber band. For the sterile swabs, we took Q-Tips and dipped them in a cup of boiling water. Sadly, this formula grew mold but no bacteria.


Stirring the gelatin.

We had better luck with the second formula. It came from a website called Science in the Real World and was designed by biologist Teresa Thiel of the University of Missouri. It used unflavored gelatin, beef boullion cubes and sugar. We used bacteria from yogurt, a toilet, the stem of our hydroponic tomato plant, the inside of one of our mouths, the inside of our refrigerator, the inside of our fish tank, a window, the inside of one of our navels, some dirt from our back yard, the kitchen counter, a sock, and one of our fingers.

The naval smear and the finger smear at 7 days.


The dirt smear after 2 days and after 7 days. The fuzz on the right is mold.

The plant smear and window smear (see top) at 7 days.

At the end of the week, we're going to dispose of the smears and bleach out the box so that any possible escaped bacteria won't start infecting our house.

Saturday, May 23, 2009

Yogurt


This week for Biology, we made yogurt using a bacterial process. The bacteria ferments the yogurt by converting milk sugar to lactic acid. We used store-bought yogurt as starter to introduce the bacteria into the milk. The milk is heated to kill off bad bacteria and to alter the proteins to give it a better consistency.


There isn't much to do for this experiment so the instructions are in the photo captions.
Source: New York Times. You can also read more about the biology of yogurt making here.


The Ingredients: All you need is some yogurt, milk, a closed container, something to keep it warm, and a candy thermometer.


Put 3 1/2 cups of milk in a pan and heat.


The milk's temperature being tested. You want it to go up to 180 degrees.


Then put the pan inside a larger pan filled with cold water. Cool the milk down to 120 degrees.


The yogurt being poured into the container -- a quart-sized travel mug.
You want to mix in about about 2 tablespoons of yogurt to one quart or less milk.


Keep the container warm for about 12 hours. We put ours in an insulated lunch cooler.
When it's done, put it in the refrigerator. Homemade yogurt will keep for one week. Enjoy!

Monday, April 27, 2009

Yeast Cell Monday


Now that I've got a live sourdough starter residing in my refrigerator, I have to remember to feed it once a week. And since that process involves removing some of the old starter, I'm going to try to bake with it, rather than just toss it out. Last week's waffles were not universally loved. (For some, "tangy" and "waffles" apparently don't go together.) So I will try some more bread, which was much more popular. In fact, I could see how it could become addicting.

Anyway, the yeast posts the kids put together left out a look at yeast cells. So here they are. Yeast cells are jelly-bean shaped. At the top left is an electron microscope photo of yeast cells dividing from Science Image in Australia. The diagram at right is from a bread baking webpage.

These two photos were taken with our microscope at 400X magnification. To the left is a digitally-enhanced photo of storeboughten baker's yeast. If you click on it, you can see it large enough to pick out the nuclei in some of the cells. To the right is the wild sourdough yeast we captured in our kitchen.

Why yeast cells are interesting, from the Howard Hughes Medical Institute:
Key findings about human genes have come from studying the humble, blob-like cells of baker's or brewer's yeast, which one researcher calls, shockingly, our relatives. In 1996, yeast became the first eukaryote (an organism whose genetic material is enclosed in a cell nucleus) to have its entire genome sequenced. Ever since, it has remained at the forefront of research on genetics. Almost everything we know about the cell-division cycle, for instance, comes from experiments with yeast, and many new methods of analyzing genes were first tried out in yeast.
Some more resources on yeast cells:

The University of Sidney in Australia's website on fungi.

Wednesday, April 22, 2009

What is ATP?


Today's episode of Unseen Life on Earth talked about ATP, but somehow I didn't catch what ATP was. The video above offers a quick explanation using cereal. You can also check out:

ATP and Energy Storage from Biology in Motion - a cartoon mini-lecture

Tuesday, April 21, 2009

What is a cell?


I've been trying to find some resources that explain the basics of cell biology, including explaining what all those little organelles are. So far most of the sites I've found seem designed for reviewing material that's already been covered. So I'm making a list here of some sites that we can check out. Hopefully some will turn out to be useful. I'll add more as I find them, and list them in the sidebar as well.

Basics of Cell Structure:

Cells from Enchanted Learning. (This is a website aimed at elementary students that I used a lot when my kids were younger. Still good for really basic information on lots of topics.) Includes directions for making a model of a cell from Jello and candies.

Plant cell pitch-penny game: From Ellen McHenry, for elementary-age kids

Cell (biology) from Wikipedia

The Virtual Cell Webpage: There is an "online text" written in simple language for rank beginners, and a 3D animated cell to explore.

Cell Ultrastructure from BiologyMad. Also clearly written. To find it, click on AS Biology, then Microscopy, Cells, Diffusion & Membranes, then scroll down to Cell Ultrastructure.

What is a Cell? from the National Center for Biotechnology Information

Inside the Cell, an interactive online publication from National Institute of General Medical Sciences (also available as PDF)

A Tour of the Cell from the National Science Foundation. The illustrations here are somewhat clearer than some of the others.

More Advanced:

Unseen Life on Earth: We've started watching this online 12-part video series, based on a PBS special

Inside a Cell from the University of Utah

Photos and Videos:

The Biobus is a mobile educational lab in NYC. Their website has videos of crawling goldfish cells. (Maybe we can try that with some of our goldfish!)

Virtual Cell Animation Collection

The Inner Life of a Cell (3D Animation, no narration - look for link in article about how the video was made)

Thanks, Lorna!

Monday, April 20, 2009

Capturing wild yeast to make sourdough bread


The yeast starter The finished loaves

Last week, we were trying out a yeast experiment that didn't work out in time for the post, but this week we have successfully finished the project: making sourdough bread using home-grown yeast.

Growing Yeast (Or "Starter")
Source: Recipe Zaar

Ingredients:
1/2 cup unsweetened pineapple juice
1/2 cup whole wheat flour
1 cup unbleached all-purpose flour
2 cups water

DAY ONE: Mix 2 Tablespoons flour and 2 Tablespoons pineapple juice. Stir well, cover and let sit for 24 hours at room temperature.


DAY TWO: Add 2 Tablespoons flour and 2 Tablespoons pineapple juice. Stir well, cover and let sit another 24 hours at room temperature. We started to see bubbles.

DAY THREE: Add 2 Tablespoons flour and 2 Tablespoons pineapple juice. Stir well and let sit 24 hours at room temperature.

DAY FOUR: Stir mixture and measure out 1/4 cup--discard the rest. To the 1/4 cup, stir in 1/4 cup flour and 1/4 cup water. Let sit 24 hours at room temperature.

REPEAT Day Four until mixture expands to double its size and smells yeasty.


The starter being poured into a bowl

Updated: Kathy's Foolproof (!) Whole Wheat Sourdough Recipe
To make a loaf for supper, I make the sponge the night before, make the dough after breakfast, shape the loaf after lunch and turn on the oven to bake the bread (no preheating) about 35 minutes before I need to start making supper. Then I use the hot oven for whatever I'm making that night.

Ingredients:
3 cups of sponge (proofed starter)
1 cup whole wheat flour
2 cups white flour (less or more as needed)
4 teaspoons of sugar
2 teaspoons of salt
1 tablespoon of olive oil
  1. To make the sponge, add one cup water and one cup whole wheat flour to starter in large bowl. Let sit out overnight (or at least 2 hours). If you use a glass bowl, you can check that it is bubbly all the way through.
  2. Measure out the sponge for the bread into a large mixing bowl. Take the leftover starter and add one cup water and one cup flour. Mix, cover, and return to the refrigerator.
  3. Take the sponge for the bread and add the sugar and salt. Mix well, then knead in the flour a half-cup at a time. Knead in enough flour to make a good, flexible bread dough. The dough should stretch, not tear, when you fold it.
  4. Pour oil into bowl. Put dough in bowl and turn until covered in oil. Let rise, loosely covered, in a warm place (like an oven heated for 1-2 minutes) for ~3 hours, or until doubled.
  5. Place dough on baking tray. Gently knead and shape into a loaf. Make three gashes across the top. Let rise again, loosely covered, 2-3 hours.
  6. Remove covering on loaf. Sprinkle with water. (This makes the crust crispy.) Turn oven on to 425 degrees F. (No preheating needed.) Bake about 35 minutes, or until brown and fragrant. Loaf should sound "hollow" when tapped on bottom.
NOTE: If you don't use your refrigerated starter in about a week you will need to feed it. Remove one cup of starter (you can use it for waffles!), add one half cup each water and flour, mix, and return to fridge for a week. Continue indefinitely.

ALSO NOTE: The liquid that sometimes separates out is called hootch, and smells like it! Just stir it back in.

The two loaves made on our second try. (Ready to go into the oven.)

Some links we used:

Breadtopia video
Microbiologist Debra Wink's sourdough experiment
Sourdough use and maintenance tips from King Arthur flour
Sourdough basics by S. John Ross