

Showing posts with label Hydroponics. Show all posts
Showing posts with label Hydroponics. Show all posts
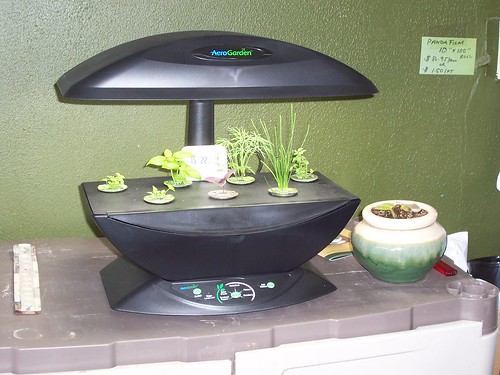
Wednesday, April 21, 2010
Stuffed Triops and other Fun Critters
Thursday, February 18, 2010
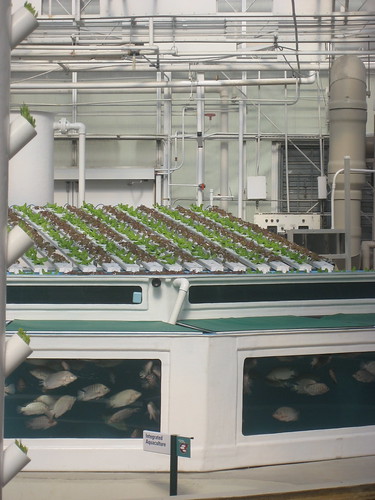
A Cool Article on Aquaponics

Image: NYT
When we brought the goldfish in from the plastic pond in the backyard last fall, they had doubled in size. So we picked up a second tank to keep them in. Our tanks are self-contained: rocks, plants and fish in their own ecosystem, without filters. (We change half of the water and wipe the tank down every week.)At one point we gave a thought to putting at least one of the 10-gallon tanks on the shelf by the back sliding door, where we had our hydroponic set-up last year, and trying to grow veggies on the top of it. We never followed through. (As a side note, for the first time in my experience the boxes of dirt-planted herbs I brought in last fall are still doing going strong indoors this winter.)
However, this New York Times story describes an aquaponic experiment very similar to what we were thinking about. Given how wet our property is, we don't need to grow in tanks year-round, but maybe we'll give it a try next winter.
Tuesday, March 17, 2009
Disney Hydroponics
 This picture of hydroponic veggies in a fish tank is from the Homeschooled Twins blog. The family took a behind the scenes tour of a ride at Disney World in Florida called Living with the Land. Looks like a lot of fun!
Thursday, February 26, 2009
More Hydroponics-Starting to Harvest
We had some lettuce on our sandwiches today. The tomatoes are getting bigger, but nowhere near flowering or fruiting. Here's an update on our indoor water-based gardens:
1. The original containers and the paper cups we were using to hold the seedlings became moldy. We moved the plants back into the plastic cages and changed the containers.

2. We have been testing the pH of the water regularly. After our visit to a local hydrofarm (to be described soon), we've been trying to keep it to 5 or 6. We have been adding vinegar or aspirin to bring it down. This seems to be working.


3. Both lettuce and tomatoes continue to grow rapidly. However, they are kind of floppy.A look at the nutrient mixture we are using (Formula X) found no calcium among the listed ingredients.
We called the company and was told that "not everything is listed." But given how weak the plants are, we are going to look for a calcium supplement to add. Calcium nitrate -- saltpeter, which I didn't manage to find when doing chemistry last year! -- seems to be what we need. We'll have to try the hydroponics shop again...Plants need about 16 different essential elements for optimum growth. Macronutrients, which are ordinarily found in soil, are needed by plants in rather large amounts. (Hydrogen, oxygen, and carbon are also necessary in large amounts, but are available to plants from the air and water.) The following are essential macronutrients:
Monday, February 2, 2009
Hydroponics Update
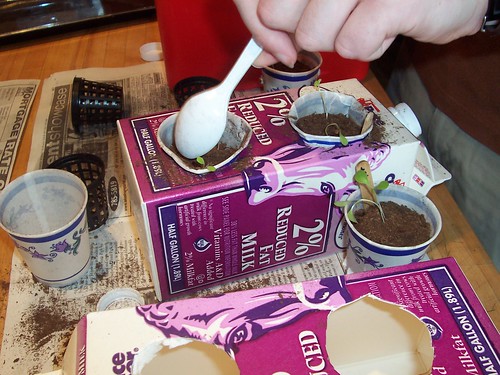
For our project this month, we've been growing more hydroponics plant (lettuce and cherry tomatoes this time.) Unfortunately, after the second day growing them, all the plants grew moldy, and we had to throw them out and start over.
Starting over:


We've been growing them in plastic cups now, and we use cocoa fiber soil. The new ones haven't grown any noticeable mold, and have been growing pretty nicely. We have noticed that the tomatoes aren't growing as fast as the lettuce, though.


Improving our set-up:
On day 18, we moved the lights closer to the plants, so they would absorb more light. Also, we moved the shelf closer to the heating vent.

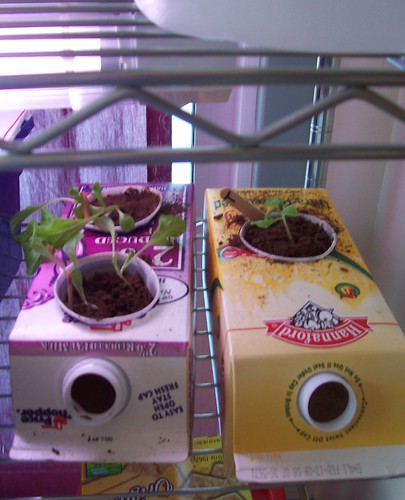
We also recently moved the tomato plants into some empty milk cartons we cut holes in, and they've been growing at a faster rate now. They should be ready to harvest in about a week. So, the project has been going pretty well so far.
Tuesday, December 23, 2008
More Hydroponics - Sprouts
We've done a small side project to the hydroponics project. This one is about sprouts. It wasn't that hard to do since all that had to be done was rinsing the seeds. It took us about 5 days to do this project, and we managed to get great results. After using them up in sandwiches, we started another jar.


These are the sprout seeds, the bigs ones are radish seeds, and the smaller ones are alfalfa.


This is us setting up the jars, first we just some pantyhose to make the top of the jar, then we added water and the seeds and put them in the cabinet to dry.


The seeds after they finished growing. We rinsed and dehulled them. Then we dried them and put them in bags to be eaten.
Make a sprouter jar. (Source)
- Cut a piece of pantyhose or cheesecloth to fit over the top of a quart jar. It needs to be big enough to drape over the edge at least an inch or so.
- Keep it in place by stretching a rubber band around the outer edge of the jar. If it is a canning jar, you can also use the rim from a canning lid.


The seeds after they finished growing. We rinsed and dehulled them. Then we dried them and put them in bags to be eaten.
Sprout alfalfa or radish seeds (Source: SproutPeople.com)
1. Put 1 tablespoon of alfalfa sees or 3 tables of radish seeds in your sprouter jar. Cover by stretching your fabric over the top and fastening as described above.
2. Put jars someplace out of direct light where they won't be disturbed. Allow seeds to soak for 6-12 hours.
3. Drain off the soak water.
4. Rinse thoroughly with cool water. Drain thoroughly.
5. Set your sprouter anywhere out of direct sunlight and at room temperature between rinses. This is where your sprouts do their growing.
6. Rinse and drain again every 8-12 hours for 3 days.
7. Greening: On the 4th day relocate your sprouts to a brighter location. Avoid direct sun - it can cook your sprouts. Indirect sunlight is best but virtually any light will do. Experiment - you will be amazed at how little light sprouts require to green up.
8. Continue to rinse and drain every 8-12 hours.
9. Finishing: Your sprouts will be done during day 5 or 6. The majority of sprouts will have open leaves which will be green if you exposed them to light.
10. De-Hull: Before your final rinse remove the seed hulls. Transfer the sprouts to a big (at least 3-4 times the volume of your sprouter) pot or bowl, fill with cool water, loosen the sprout mass and agitate with your hand. Skim the hulls off the surface. Return the sprouts to your sprouter for their Rinse and Drain.
11. Harvest: Your sprouts are done 8-12 hours after your final rinse. After the de-hulling and the final rinse we need to drain very thoroughly and let our sprouts dry a bit. That will help them keep longer in the refrigerator. Let sit for 8-12 hours OR use a salad spinner.
12. Refrigerate: Transfer the sprout crop to a plastic bag or the sealed container of your choice.
Wednesday, December 10, 2008
Hydroponics!
Note from mom: I take no responsibility for the captions, or the exclamation mark overdose. The project we are working on here comes from this elementary school website from Hawaii.
This week for biology, we decided to start a hydroponic garden.We decided to grow some lettuce and basil. So we poked holes in some paper cups, put them in a metal tray full of water, added sphagnum moss and seeds, and waited a week. We also put plastic tops on the tray to keep the water from evaporating.
Yesterday we looked at the seeds with our digital microscope. We saw that the basil was growing mold, so we threw it out. We noted that the lettuce seeds are starting to grow.
Setting up the cups.

Sphagnum!!!

Sphagnum in a cup.

Sphagnum magnified 60 times.

The trays chillin' on their shelf.

Xenomorph egg, or basil seed? you decide.

Subscribe to:
Posts (Atom)


