Tuesday, December 23, 2008

More Hydroponics - Sprouts

We've done a small side project to the hydroponics project. This one is about sprouts. It wasn't that hard to do since all that had to be done was rinsing the seeds. It took us about 5 days to do this project, and we managed to get great results. After using them up in sandwiches, we started another jar.

These are the sprout seeds, the bigs ones are radish seeds, and the smaller ones are alfalfa.


This is us setting up the jars, first we just some pantyhose to make the top of the jar, then we added water and the seeds and put them in the cabinet to dry.

Make a sprouter jar. (Source)
  1. Cut a piece of pantyhose or cheesecloth to fit over the top of a quart jar. It needs to be big enough to drape over the edge at least an inch or so.
  2. Keep it in place by stretching a rubber band around the outer edge of the jar. If it is a canning jar, you can also use the rim from a canning lid.


The seeds after they finished growing. We rinsed and dehulled them. Then we dried them and put them in bags to be eaten.

Sprout alfalfa or radish seeds (Source: SproutPeople.com)

1. Put 1 tablespoon of alfalfa sees or 3 tables of radish seeds in your sprouter jar. Cover by stretching your fabric over the top and fastening as described above.

2. Put jars someplace out of direct light where they won't be disturbed. Allow seeds to soak for 6-12 hours.

3. Drain off the soak water.

4. Rinse thoroughly with cool water. Drain thoroughly.

5. Set your sprouter anywhere out of direct sunlight and at room temperature between rinses. This is where your sprouts do their growing.

6. Rinse and drain again every 8-12 hours for 3 days.

7. Greening: On the 4th day relocate your sprouts to a brighter location. Avoid direct sun - it can cook your sprouts. Indirect sunlight is best but virtually any light will do. Experiment - you will be amazed at how little light sprouts require to green up.

8. Continue to rinse and drain every 8-12 hours.

9. Finishing: Your sprouts will be done during day 5 or 6. The majority of sprouts will have open leaves which will be green if you exposed them to light.

10. De-Hull: Before your final rinse remove the seed hulls. Transfer the sprouts to a big (at least 3-4 times the volume of your sprouter) pot or bowl, fill with cool water, loosen the sprout mass and agitate with your hand. Skim the hulls off the surface. Return the sprouts to your sprouter for their Rinse and Drain.

11. Harvest: Your sprouts are done 8-12 hours after your final rinse. After the de-hulling and the final rinse we need to drain very thoroughly and let our sprouts dry a bit. That will help them keep longer in the refrigerator. Let sit for 8-12 hours OR use a salad spinner.

12. Refrigerate: Transfer the sprout crop to a plastic bag or the sealed container of your choice.

Tuesday, December 16, 2008

Why Everyone Should Learn the Theory of Evolution

An opinion piece in the January 2009 issue of Scientific American focusing on "The Evolution of Evolution" has this to say about Darwin:
Darwin’s genius—and, yes, genius is the right word—is manifest in the way his theory of evolution can tie together disparate biological facts into a single unifying framework. Evolutionary geneticist Theodosius Dobzhansky’s oft-cited quotation bears repeating here: “Nothing in biology makes sense, except in the light of evolution.”

Read the rest of SciAm's features -- including Testing Natural Selection with Genetics, Putting Evolution to Use in the Everyday World, and The Latest Face of Creationism in the Classroom -- here.

Wednesday, December 10, 2008

Hydroponics!

Note from mom: I take no responsibility for the captions, or the exclamation mark overdose. The project we are working on here comes from this elementary school website from Hawaii.

This week for biology, we decided to start a hydroponic garden.We decided to grow some lettuce and basil. So we poked holes in some paper cups, put them in a metal tray full of water, added sphagnum moss and seeds, and waited a week. We also put plastic tops on the tray to keep the water from evaporating.
Yesterday we looked at the seeds with our digital microscope. We saw that the basil was growing mold, so we threw it out. We noted that the lettuce seeds are starting to grow.


Setting up the cups.

Sphagnum!!!

Sphagnum in a cup.

Sphagnum magnified 60 times.

The trays chillin' on their shelf.

Xenomorph egg, or basil seed? you decide.

Friday, December 5, 2008

Top 10 Amazing Biology Videos

Interesting list compiled by Wired Science blogger Aaron Rowe. Some of the links look funky, but they all work. Enjoy!

Wednesday, December 3, 2008

Roger Ebert's Review of Expelled


Movies are big at my house, and no mention of a title can pass without a certain child announcing how many stars it was given by Chicago Sun-Times film critic Roger Ebert.

Ebert lost his ability to speak after an operation not long ago. But he has more than made up for it by creating a wonderful blog that touches on every subject under the sun, not just movies.

A few weeks back he ran a puzzling blog post that seemed to be favoring creationism. I immediately Googled him to find that he is indeed a staunch proponent of evolutionary theory. And he did later explain the post was intending to make a point.

Today he has posted a review of "Expelled," the documentary by Ben Stein which claims American schools are unfairly censoring creationist theory. You can read "Win Ben Stein's Mind" here.

Tuesday, December 2, 2008

Triops Part 2


(This is a follow-up to the November 6th post about our pet Triops)
In our last post (about the Triops), we talked about how to grow a Triops, and what to feed it, plus a log of what happened in the first nine days we had one. Since then, our Triops has doubled in size, and has molted several times, and she seems to be getting ready to molt again. Also, she has gotten so large that we've started feeding her carrot peels and frozen brine shrimp. And, (possibly due to the fact that we leave the light above her tank on 24 hours a day) her tank has started getting much murkier (possibly from algae.)

Physical features that we can really see now include her legs and her antennae. Her tail is longer and you the third eye is less pronounced.

Monday, December 1, 2008

Micronaturalist's Notebook

BioMEDIA ASSOCIATES produces multimedia programming for life science instruction for middle school, high school, and college students that captures the diversity of the living world. You can purchase their videos on their website, or just take a look around at some of the interesting images and information.

Being into microphotography, I am planning on taking a closer look at the MicroNaturalist’s Notebook by award-winning biological photographer, Bruce J. Russell.

Image courtesy of BioMEDIA ASSOCIATES

Monday, November 24, 2008

Hippocampus- Free Online AP Biology Course

From the HippoCampus Teaching Biology blog:
November 24, is the 149th anniversary of the publication of On the Origin of Species, a book that launched a scientific revolution and forever altered our understanding of who we are. In the last century and a half, both the book and its author have become icons, household names that most people recognize but many only know in a superficial and caricatured way. Charles Darwin, morose old man with a big white beard, who took a boat ride one day and got hit in the head with a finch, thus discovering evolution. The theory of evolution, aka survival of the fittest, except it must not be true because it’s still only a theory after all this time.


HippoCampus is a project of the Monterey Institute for Technology and Education whose is to provide "high-quality, multimedia content on general education subjects to high school and college students free of charge." According to their website, HippoCampus content has been developed by "some of the finest colleges and universities in the world" and contributed to the National Repository of Online Courses, which makes editorial and engineering investment in the content to prepare it for distribution by HippoCampus.

The HippoCampus Biology home page has links to the blog, other interesting-looking biology content -- and a complete, free, online AP Biology course.

Although AP (Advanced Placement) courses are a useful way to earn some college credit while still in high school, I've decided not to pursue them for my kids. In school-school they indicate that the student is willing to work harder on what is billed as a higher level course. But for us as homeschoolers, it just means more hoops to jump through and another test to teach to. I'd rather devote my energies to hands-on activities, a variety of books and resources, and focusing on a few topics of interest to me and the kids.

On the other hand, who knows what we'll want down the road.

My quick impression the AP Bio course is that it consists of a fairly pleasant young voice reading a textbook, accompanied by related graphics. Despite the idea that AP classes are supposed to be for the creme de la creme of high school students, the content and its presentation seems to be at a middle school level (at least the introduction). In other words, it sounds more like learning software you'd see in the earlier grades than a college lecture.

If you try this Hippocampus AP course (or any other) I'd be interested in hearing what you think!

Saturday, November 22, 2008

The winners of the 2008 Olympus BioScapes Digital Imaging Competition are up at olympusbioscapes.com.

The Olympus BioScapes Digital Imaging Competition recognizes outstanding images of life science specimens captured through light microscopes, using any magnification, any illumination technique and any brand of equipment.

Images are judged based on the following criteria:
  • Science - Uniqueness of the specimen or processes shown, importance of work, new information revealed, "story" told.
  • Aesthetics - Beauty or impact of the image, balance, composition.
  • Technical merit - Challenge of specimen itself - difficulty of capturing structures or data shown, photographic excellence.
Entry deadline for next year's competition is September 30, 2009, and First Prize is the winner's choice of Olympus microscope or camera equipment valued at $5,000. Nine additional winners will also receive valuable prizes from Olympus, and many more will receive recognition as honorable mentions. Winners also are displayed at museums around the country. This year's museum tour will go to:

BioScapes Museum Tour Schedules
March 1, 2008 - May 30, 2008 - DaVinci Science Center, Allentown, PA (2006 Tour)
March 17, 2008 - May 9, 2008 - University of Rochester Med Ctr, Rochester, NY (2007 Tour)
April 7, 2008 - July 1, 2008 - St.Louis Museum of Science, St.Louis, MO (2005 Tour)
May 19, 2008 - July 25, 2008 - MBL, Woods Hole, MA (2007 Tour)
June 2, 2008 - August 29, 2008 - Maryland Science Center, Baltimore, MD (2006 Tour)
July 7, 2008 - October 1, 2008 - Dallas Science Center, Dallas, TX (2005 Tour)
August 1, 2008 - October 31, 2008 - NY Hall of Science, New York, NY (2007 Tour)
November 1, 2008 - December 21, 2008 - San Diego Science Center, San Diego, CA (2007 Tour)

Wednesday, November 19, 2008

Wayne's Word Online Textbook of Natural History

I'm currently working on a children's activity book about the desert for Nomad Press. My research is turning up a lot of great websites, among them Wayne's Word, an online Textbook of Natural History written by Wayne. P. Armstrong. The website is a supplement to Professor Armstrong's general biology and botany courses at Palomar College in California.

Armstrong is retired, but continues to teach two of his courses -- Plants and People (Botany 115) and General Biology (Biology 101)-- online, with no meetings on campus. He writes that both courses are based on the thousands of pages of lecture notes that were laboriously placed on blackboards and whiteboards for more than thirty years, along with more than 2,300 photo images and illustrations.

That's a lot of material, all available online, for free. While I've only skimmed the site and read a few articles (about desert micro-organisms), it seems to be accessible, well organized and nicely illustrated. Check it out!

Thursday, November 6, 2008

Triops!

THE TRIOPS PROJECT
For science this month, we decided to grow some Triops longicaudatus (Sold in stores as Triops.)

Information:
Members of the order Notostraca (colloquially referred to as notostracans, called Triops, tadpole shrimp or shield shrimp) are small crustaceans in the class Branchiopoda. Triops have two internal compound eyes and one naupliar eye in-between, a flattened carapace covering its head and leg-bearing segments of the body. The order contains a single family, with only two extant genera. Their external morphology has apparently not changed since the Triassic appearance of Triops cancriformis around 220 million years ago. Triops cancriformis may therefore be the "oldest living animal species on earth." The members of the extinct order Kazacharthra are closely related, having been descended from notostracans. -Wikipedia

The tadpole shrimp (scientific name = Triops longicaudatus, which are in the order Notostraca in the class Branchiopoda) inhabits freshwater, ephemeral ponds ranging from 50ºN latitude in western North America through Central America and into South America. In the U.S., Triops are found in desert habitats (see Figure 1). They live in small pools that accumulate after flash floods in the summer. Since these pools are rather short-lived, the Triops consequently have short lifespans, completing their life cycles in a mere 20-40 days! -The Triops Information Page

Set Up

  1. The first thing is to get all the items you need- If you have a kit, you should only need a light (for keeping the water warm) and container. (Some big kits come with one.)
  2. For the light, we used a desk lamp with a 50 watt bulb; you should check your instructions as too how hot the water needs to be though. (Mom's note: we used a reflector bulb, which threw more light/heat on the tank and less into the room.)
  3. For the container and water, start with a small one (you'll need to switch to a bigger one when they get larger) and fill it leaving 1 inch at the top with spring water. You also want to cover some of the tank with some aluminum foil to give them some shade.
  4. Before you put the eggs in, you need to put nutrients in. Most kits come with them, but if not, you can make your own with leaves.
  5. After 24 hours, put the triops in the container.
  6. The triops will hatch 18 hours after you put them in. When they do, you shouldn't feed them for another 24 hours.
  7. On day 2, start feeding them the food pellets. (These will come in the kit.) Give them 1/2 of some crushed green and brown pellets, and continue until you think they can eat a whole pellet on their own. (Usually by day 4.)
  8. When the start eating whole pellets, switch between green and brown.
  9. By this time you should switch them to a bigger container, as they won't be able to grow in the small one. We got a container that was three times bigger than the smaller one, which has worked. (If you want them to lay eggs, put 1/2 an inch of sand at the bottom.)
  10. Just keep feeding them until they die. If they laid eggs, let the water evaporate and start over with the new batch.

When we started the triops, we also started a log of what they were doing. This is it:

Day 1:


11:00 AM: We added our Triops eggs to the water we prepared in a plastic container.
5:00 PM: We added more water to replace the water that evaporated.


Day 2:

10:30 AM: Our first Triops hatched!!
8:00 PM: we spotted another Triops swimming around (We never saw him again, and presumed that the bigger one ate him.)

Day 3 :

9:40 AM: We fed the Triops. (A quarter of one of the green and brown pellets that came with the package.)

Day 4: (We forgot to take notes on Day 4.)


Day 5:


10:20 AM: Fed her. Same as before.

Day 6:

8:50 AM: Fed her (same as Days 3 & 5) We noted that at this point, our remaining Triops was 3/4 of an inch long.
11:30 PM: We used a pipette to suck up some sludge that was growing inside her container.


Day 7:

3:00 PM: We fed her (2 crushed pellets this time)
3:40 PM: We moved her to a bigger container.
Also, on this day, she molted!

Day 8: (We forgot to write down the time)

Fed the Triops (We started feeding her twice)
We noted that her movement has slowed down a bit.
Day 9: (We didn't write down the time today either.)

We fed her a green pellet. (We're not sure what the difference between a green pellet and a brown pellet is.) (Mom's note: green is vegetable, brown is meat. Mmmm.)

We also took an awesome video of her swimming around with our new digital microscope!

That's all we've done so far, but we'll have regular updates as things progress.

Links:

ToyOps: made the kit we bought
A Triops Classroom Guide: Lots of useful info and experiments (PDF)
My Triops: Hobbyist Stuart Halliday's site from the UK
Microscope Projects with Triops: Good general microscope site!


Saturday, November 1, 2008

Microphotography (and Photomicrography)


I can't believe I forgot to cross post this really cool How-To I wrote for Wired.com on taking photographs with your microscope! (There's also a related GeekDad post with some helpful links.) It spawned an email argument with a reader over the proper term; here's what Wikipedia says:

A micrograph, microphotograph or photomicrograph is a photograph or similar image taken through a microscope or similar device to show a magnified image of an item.

We'll be doing a lot more of this, whatever you want to call it, in the near future. We're still trying to find out exactly what the wiggly guy up top is.

Friday, October 31, 2008

Open Courseware Resources

Just got a tip about this post collecting 100+ Incredible Open Courseware Resources for Science Geeks. The courses are college level, of course, but often they include links, lesson plans or experiments that are useful for teaching younger kids at home. Among the biology topics are genetic modification and natural selection.

Friday, October 24, 2008

Human Anatomy Books Old and New

My review of David Macaulay's new book The Way We Work is up at GeekDad. Although ostensibly for younger kids, at 363 pages it's definitely suitable for middle and high school students. Macaulay spent 6 years laboring on this book, four of them just learning anatomy through means that included attending operations and dissecting corpses. You can find out more about Macaulay's techniques at his website.


For lower grades I heartily recommend the book mentioned a few posts back, The Human Body Book and See-Through Model by Luann Colombo. While the "visible man" was rather chintzy, it was helpful to put the organs together while learning about the related system ... plus it wasn't too gross looking sitting out on a shelf.


Another book we liked a lot when they were little was
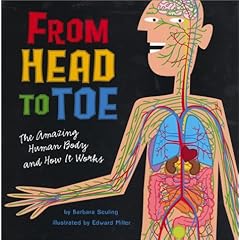
From Head to Toe: The Amazing Human Body and How It Works by Barbara Seuling. The illustrations by Edward Miller are much more stylized than anatomically correct (so to speak), but probably just enough for really young kids. The book includes several projects, including the robot hand (example here) I later borrowed for a Home Education Magazine column. If you go to Miller's website and click on "Activities for Kids" you'll find an additional project that lets you print out and paste the organs on a drawing of the human body. My boys enjoyed doing that one as well when they were small.

Tuesday, October 21, 2008

Life Science Illustrators

You may have noticed the lovely illustration of Bryozoa a few posts back. Today on GeekDad Daniel Donahoo posts about the artist, Ernst Haeckel. As Daniel points out, you can find a whole gallery of Haeckel's work on Wikipedia. Donahoo prints them out in color as posters for his kids' rooms. Of course there are many other wonderful life science illustrators to check out as well. Here are a few:

Carl Linnaeus, also known as Carl von Linné or Carolus Linnaeus, is often called the Father of Taxonomy. According to the University of California Museum of Paleontology:


His system for naming, ranking, and classifying organisms is still in wide use today (with many changes). His ideas on classification have influenced generations of biologists during and after his own lifetime, even those opposed to the philosophical and theological roots of his work.


John James Audubon is famous for his bird portraits, of course. Says Wikipedia:
Audubon's influence on ornithology and natural history was enormous. Nearly all later ornithological works were inspired by his artistry and his high standards. Charles Darwin quotes Audubon three times in The Origin of Species and also in later works. Despite some errors in his field observations (e.g., he thought an immature bald eagle to be a separate species), his notes were a significant contribution to the understanding of bird anatomy and behavior. Birds of America is still considered one of the greatest examples of book art.
Although not primarily known as a naturalist, Albrecht Durer's watercolor of a hare is one of my favorite nature illustrations, and he has many more. Dürer believed that "…art must be based upon science—in particular, upon mathematics, as the most exact, logical, and graphically constructive of the sciences." In his Treatise on Proportion, he commented, "Life in nature makes us recognize the truth of these things, so look at it diligently, follow it, and do not turn away from nature to your own thoughts…. For, verily, art is embedded in nature; whoever can draw her out, has her."

Beatrix Potter -- author of Peter Rabbit and many other children's books -- was not only a writer and an artist; she was an accomplished, if not acknowledged, scientist. As Wikipedia relates:

An uncle attempted to introduce her as a student at the Royal Botanic Gardens at Kew, but she was rejected because she was female. Potter was later one of the first to suggest that lichens were a symbiotic relationship between fungi and algae. As, at the time, the only way to record microscopic images was by painting them, Potter made numerous drawings of lichens and fungi. As the result of her observations, she was widely respected throughout England as an expert mycologist. She also studied spore germination and life cycles of fungi. Potter's set of detailed watercolours of fungi, numbering some 270 completed by 1901, is in the Armitt Library, Ambleside.

In 1897, her paper on the germination of spores was presented to the Linnean Society by her uncle Sir Henry Enfield Roscoe, as women were barred from attending meetings. (In 1997, the Society issued a posthumous official apology to Potter for the way she had been treated.) The Royal Society also refused to publish at least one of her technical papers. She also lectured at the London School of Economics several times.
There's more about Beatrix Potter, scientist, at The Scientist.


Monday, October 20, 2008

Free Science Texts from Amsco Publications


Go to the AMSCO School Publications website and you'll see a link for free textbooks available for a short time as downloadable PDF files. The current offering is marine biology, but for some reason the PDFs weren't viewable. However I not only found links that do work, I found other PDF files as well. They may not be available for long, so grab them if you want them. Here they are:

Marine Science: Marine Biology and Oceanography

Marine Science: Marine Biology and Oceanography/Teacher’s Manual with Answers


The Living Environment: Biology/Teacher's Manual

EARTH SCIENCE: The Physical Setting

Contemporary Chemistry THE PHYSICAL SETTING

Contemporary Chemistry THE PHYSICAL SETTING/Teachers Manual

Sunday, October 19, 2008

Lesson Planning

Although I haven't really done any "planning" or "teaching" up to this point it is encouraging to see that we've already begun several of the activities I was hoping to get into as we study biology this year:

Project

Activity (Purpose)

Date

Results

Further Activities

Cricket

Pet care

Aug 08

Released into wild

Hermit Crab

Pet care

Aug 08

Goldfish

Aquarium maintenance

Spring 08

Backyard Field Survey

Enter and analyze data

Sept. 08

Learn Excel to record data

Studying Bryozoa

Using the microscope

Sept. 08

Discovered exotic life form

Microphotography

Pond Water

Using the microscope

10/8/08


I made up this chart so that I can post it downstairs by our homeschool work area. The idea is that the kids can see what upcoming projects we can do and take charge of doing them. The chart continues with:

Growing Triops
Brewing Root Beer with Yeast
Making Yogurt (live bacteria)
Cheese making?
Separating out DNA
Testing Antibiotics
Luminescent Bacteria Lab
Hydroponics

I got most of these experments from The Science of Life: Projects and Principles for Beginning Biologists by Frank G. Bottone, Jr. The last time we covered biology, in 2003, I was shocked to discover that the Plant/Animal classification system I had been taught (and which was also used as an organizing principle in the homeschooling guide The Well-Trained Mind – with the addition, as I recall, of humans as a separate category for those uncomfortable with the idea that humans are animals) was completely outdated. Instead, there were (depending on who you read) at least five “kingdoms:” Monera, Protista, Fungi, Plantae, and Animalia. The Science of Life had all kinds of interesting and do-able projects for each classification. We did a few, including watching mold grow (systematically, not on the stuff in the back of the refrigerator) and growing carnivorous plants. When I pulled the book out again this summer, though, I found Post-its on many pages for projects we never got to. Happily, the book is written at a high enough level that it still looks like a good guide for high school.

Oh, about the kingdoms above: apparently scientists don’t use that way of classifying living things anymore, either. According to Wikipedia, modern taxonomy systems generally begin with a three-domain system of Archaea (originally Archaebacteria), Bacteria (originally Eubacteria), and Eukarya, depending on whether the cells have nuclei or not and categories of cell exteriors.

Anyway, on our first go-round we covered taxonomy, biomes (for which we put together different terrariums and aquariums), and the human body. There are a lot of websites about biomes; I’ll post the ones I’ve found as time allows. The human body resource we used was a book and see-through model combo from Andrews McMeel. (Out of print but available used.) While the model was on the flimsy side, the book was short but well-written (elementary to middle school level), nicely illustrated and had do-able activities for each body system (for instance, testing muscles or optical illusions).

I seem to have gotten off the topic of what books I am in the process of using now to develop this year’s teaching plan, so look for more soon.

Saturday, October 4, 2008

Books and Movies for Biology Students

Just a reminder that over in the sidebar I've been adding books and movies that I am recommending or hope to get to look at this year. The kids and I just watched The Andromeda Strain, a sci-fi classic by Michael Crichton (a medical doctor and author of Jurassic Park) about an alien organism. Although it's 30 years old, one Amazon.com reviewer says the techniques used by the scientists in the film are the same ones used today.

If you have a decent library system, like ours, you may be able to find most of the books and movies I'll be listing. But if you do order something from an Amazon link on my blog, I get a little kickback. Feel free to browse the "store," either way.

And add your suggestions here, too!

Thursday, October 2, 2008

The Map(s)

As the weather grows colder and we wrap up the observation portion of our 100-Species Challenge, we now need to start organizing the information we have gathered. A week or two ago the kids created a fantastic map of the backyard on which to mark the species as we found them. This morning they updated it with numbers corresponding to our list. The list isn't ready yet, but I just have to show you the map(s).

To the left is a map of the Old Champlain Canal Towpath, where we found a lot of great stuff, including our alien pods. To the right is our yard, marked off in sections to indicate lawn, unmowed "meadow," vegetable garden, fish pond, etc. The boys created the image in Corel Draw. I think it came out great!

Wednesday, October 1, 2008

Bryozoa (not aliens)


If you walked down our local canal, you would see strange growths on some of the sticks underwater. Before you hit the panic button, you may want to know out that these are non-alien animals called Bryozoa.

Bryozoa are small coral-like animals that build the strange pods in order to filter out the food they need in the water. The majority of bryozoans are marine, consisting of several thousand species. But one class, the Phylactolaemata, is found exclusively in fresh water. (These are the strange pods that you would see in your streams.) Bryozoa have also been seen in fossils dating back to 354 million years ago.

Recently we got one from our local canal to study, though we had some trouble getting it out. We had to find one that was small enough to fit in our jar, and close enough to shore to reach. (We didn't know how deep the canal was!) The colony we picked was one of two attached to a loose branch that we were able to pull on shore. Then we had to break it off to fit it in the jar. (Mom forgot her Swiss Army knife.) We made sure to fill up the jar with the water it came out of -- plus an extra container -- and carried it home carefully.

Up close, we could see that the pod was made up of clear jelly-like substance with spots all over the surface. The next day we took samples from our jar and looked at them under the microscope. First we looked at some jelly that was stuck to the stick, where the larger colony broke off. It was yellow and cloudy, but we couldn't see anything moving or otherwise interesting.

Then we used a pipette to suck up one of the small, dark green dots around the edge of the jar. (See slide on left.) Under the microscope we could see a dark center, a lighter ring, and little hooked feet sticking out all around. (Closeup on right.) This is a statoblast, which is used by the Bryozoa for reproduction. The statoblast can survive the winter and grow a new colony in the spring. According to this site, the jelly and everyone attached dissolves in cold water.

We also took scrapings from the pod itself. We saw all kinds of things moving around. Here are some of them:


We're wondering if the yellow things in the middle are the actual polyps. Here is a website with great microscopic photos and videos of Pectinatella magnifica. What do you think?