Showing posts with label Kitchen Biology. Show all posts

Tuesday, April 27, 2010

Food, Inc.

I just discovered that the documentary Food, Inc. can now be watched online at the PBS website. From the PBS companion website:
In Food, Inc., filmmaker Robert Kenner lifts the veil on our nation's food industry, exposing the highly mechanized underbelly that's been hidden from the American consumer with the consent of our government's regulatory agencies, USDA and FDA. Our nation's food supply is now controlled by a handful of corporations that often put profit ahead of consumer health, the livelihood of the American farmer, the safety of workers and our own environment. We have bigger-breasted chickens, the perfect pork chop, insecticide-resistant soybean seeds, even tomatoes that won't go bad, but we also have new strains of E. coli — the harmful bacteria that causes illness for an estimated 73,000 Americans annually. We are riddled with widespread obesity, particularly among children, and an epidemic level of diabetes among adults.
Among the experts interviewed is Michael Pollan. Last year we listened to the audio version of his excellent, accessible book, In Defense of  Food.

I've had the DVD on reserve at the library forever (my request has already expired once), so I'm very glad to see that we can now watch it on demand. Now if we can only figure out how to stream video from the computer to our ancient TV...
Reblog this post [with Zemanta]

Monday, June 29, 2009

Food Labs (Biochemistry)


Biological macromolecules like proteins, lipids (fats), and carbohydrates (sugars and starches)
are the building blocks of living cells. They also use them to store energy. This week, for biology, we made food samples, and tested them for fat and starch. Here is how we did it:


Fat Test
For the fat test, we tested samples of milk, butter, peanut butter, olive oil, Nutella, egg whites, an egg yolk, heavy cream, sunflower seeds, sesame seeds and yogurt. We also used water for the control sample. We tested them by taking a big piece of brown paper-bag-type paper, drawing squares for the samples, and spreading a little of each food in its square. We than waited for around 15 minutes for the food samples to dry. Once dry, any sample containing fat left a dark grease stain on the paper.


Starch Test
The starch test was slightly more complicated. For the starch test, we made samples of cooked pasta, bread, crackers, a blue chip, flour, a potato, sugar, corn starch. Again, we used water as a control. For the set-up, we took a small sample of each food, and put it in a small plastic cup. For the testing, we put a few drops of iodine on the sample. If the sample contained starch, the drops turned blue. This is because (from Wikipedia) "Starch forms an unstable complex (blue colored) in low concentrations of Iodine."


The potato after the Iodine was added.
As it's reacting with the starch,
the brown Iodine turns dark blue.


The sugar after the Iodine was added.
As you can see, the Iodine did not change color,
meaning that the sugar contains no starch.


One of the cracker samples we made after the iodine was added.
This sample has water added because we were trying to contrast it
with a cracker sample that we chewed up. The starch in the chewed-up
sample was supposed to convert to sugar via the enzymes in our saliva.
Unfortunately, we were unable to detect any difference
between the chewed-up sample and the regular sample.


A couple of days earlier, we made butter from heavy cream. All we did was put about half a cup of cream and a pinch of salt in a glass jar and shake it for roughly 15 minutes. First the cream became thick like whipped cream, then it separated into "buttermilk" and butter.

We followed these directions from Raft.net, which contain a simple explanation of what's happening. A more detailed chemical explanation is available at Butter Through the Ages.

Resources:

SEP: Testing for Lipids, Proteins and Carbohydrates
http://seplessons.ucsf.edu/node/362


Protein, Carbohydrate, Lipid Power Point http://teacher.edmonds.wednet.edu/mths/awelman/index.php?section=documents


Virtual Protein, Carbohydrate, Lipid Lab Tests
http://faculty.kirkwood.edu/apeterk/learningobjects/biologylabs.htm


Home Training Tools Food Lab
http://www.hometrainingtools.com/food-chemistry-projects/a/1591/


Tuesday, June 9, 2009

What's Living in Our Compost Tube?


We haven't observed any change in temperature, but the food scraps in our compost tube are definitely starting to rot. And things are growing: above, looking down the neck of the soda bottle, you can see an onion sprouting up from the pile. We also took a sample of the water which collects in the bottom of the tube and took a look under the microscope. Check out the videos below:


Here you can see some of the microorganisms living in our compost pile at 40X magnification, shot with a small hand-held digital camera. The worm above is called a nematode. Cornell's Department of Crop and Soil Science has a page about compost inhabitants. They also have an online guide called Composting in the Classroom: Scientific Inquiry for High School Students which we haven't checked out yet but will.


Above is a 400X magnification of the kidney-shaped organisms, which are probably protozoa. Here's a page about Microbial Decomposers, with microphotos, from the city of Euless, Texas.

Tuesday, April 14, 2009

Root Beer

This week for chemistry, we decided to make root beer (To learn about yeast.) We used the yeast to carbonate the soda, and we more or less followed the instructions on this site
We actually made two bottles using different methods. Here are the two methods we used:


The flavoring syrup

Bottle #1

For this one, we took all the ingredients in the original instructions, but we dissolved the sugar on the stove until it was a syrup, than we mixed the rest of the ingredients (plus a packet of Maltodextrin To make it thicker) into the syrup, and poured the syrup into the bottle along with about a liter of water.


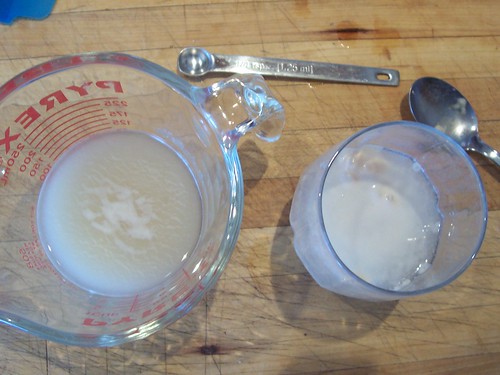
The flavoring being poured into the bottle

Bottle #2
For this bottle we pretty much followed the instructions on the website. Also, we didn't add any Maltodextrin.


A glass of the finished project

Monday, April 6, 2009

Yeast Experiments, Part 1


Yeast Week - Home Brewing

We have been doing a few yeast experiments this week, some of which are still in the process of being completed. The major part of this week was making our own root beer, which will be covered in another post. Here we have two small experiments that we did as well.


Testing Yeast Experiment.

Before we tried the root beer experiments, we found that the yeast we were going to use (it was champagne yeast from a kit) had expired in 2006, so the first thing we did was to test to see if it was still good with this experiment.

Materials:


Small glass measuring cup
Candy thermometer
Measuring spoons
Water
1 package Champagne yeast (1 package yeast = 2 1/4 teaspoons)
Sugar

1. Pour 1/4 cup water into a small glass measuring cup for liquids. Heat in microwave 20 seconds on high. Stir. Measure temperature. Water should be between 100 and 105 degrees F. If too cool, heat for 10 seconds. If too hot, add some cool water.

2. Add ½ teaspoon yeast and a pinch of sugar. Stir and let sit for 5 to 10 minutes, until the sugar and yeast dissolve. If a foamy layer forms on the surface, the yeast is still active.

3. If still active, seal the package and put in refrigerator for later. If not, throw it out.

The result was that the champagne yeast was too old to be used. We tested this along with regular baker's yeast and decided to use that instead.

Champagne yeast on the left, baker's on the right.

Watching yeast ferment

This experiment was just for fun. It has a neat effect which was very cool to see.

Materials:


2 empty soda bottles, washed no tops
2 latex balloons
2 rubber bands
glass measuring cup, 1-cup capacity
measuring spoons
clock
flour
sugar
water, room temperature
yeast

1. In each bottle put 2 teaspoons yeast, 1 teaspoon sugar and 1 cup water.

2. In one soda bottle, add 2 tablespoons flour. Mark this bottle.

3. Secure a balloon on top of each soda bottle with a rubber band.


The balloon on the left is the one without flour, the green one has the flour in it.

Links
-FoodSub - Yeast Types: http://www.foodsubs.com/LeavenYeast.html
-Red Star Brand Yeast: http://www.lesaffreyeastcorp.com/SoY/story_2.html

Monday, March 16, 2009

Growing Fungi


A couple weeks ago, for biology, we sent away for a Shiitake-mushroom-growing kit. We have since grown (and eaten) a cluster of mushrooms. Some Q&A about mushrooms:

How can I tell which wild mushrooms are poisonous?

Contrary to popular belief, there is really no discerning characteristic that all poisonous mushrooms share. Since only about 5% of wild mushrooms are edible, I wouldn’t recommend eating a wild mushroom unless you are a hundred percent sure that it isn’t poisonous.

The log with the fully-grown mushrooms.

What is the life cycle of a mushroom?

(From ArticleClick.com)
Most mushrooms reproduce asexually by releasing thousands of spores through their gills into the open air for dispersion into the environment. Every spore is capable of germinating to create a new hypha. Hyphae are masses of intertwined filaments of cells which are the morphological unit of the fungus. When a thick mass of hyphae forms it is called mycelium or mycelia. Mushroom mycelium is usually white in color with a rough, cottony texture. Root like growth is called rhizomorphic.

When spores germinate they consume the water and nutrients from their environment and begin to reproduce. The medium that mushroom mycelium grows on is usually called substrate. Before the mushroom can start to form fruit bodies the mycelium colonizes the substrate fully and when the environmental conditions are right the mushroom emerges to produce more spores.

The mushrooms after we harvested them.

What different kinds of mushrooms are native to what areas?

Probably the most common edible mushroom, the Button Mushroom, is native to Europe (and North America.) The Portobello is also native to Europe and North America. The Shiitake is native to East Asia. The deadly Death Cap is native to Europe, North Africa, North America, Australia (SE), and New Zealand.

A delicious Shiitake-mushroom-and-lettuce pizza.

Mushroom Links:

Mushroom Life Cycle
Cornell University Virtual Library: Mycology
Lost Creek Mushroom Farm (supplier)
Fungi Perfecti (supplier)
Diagram of the mushroom life cycle.

Thursday, February 26, 2009

More Hydroponics-Starting to Harvest

We had some lettuce on our sandwiches today. The tomatoes are getting bigger, but nowhere near flowering or fruiting. Here's an update on our indoor water-based gardens:

1. The original containers and the paper cups we were using to hold the seedlings became moldy. We moved the plants back into the plastic cages and changed the containers.


2. We have been testing the pH of the water regularly. After our visit to a local hydrofarm (to be described soon), we've been trying to keep it to 5 or 6. We have been adding vinegar or aspirin to bring it down. This seems to be working.


3. Both lettuce and tomatoes continue to grow rapidly. However, they are kind of floppy.A look at the nutrient mixture we are using (Formula X) found no calcium among the listed ingredients.

Important Nutrients

Plants need about 16 different essential elements for optimum growth. Macronutrients, which are ordinarily found in soil, are needed by plants in rather large amounts. (Hydrogen, oxygen, and carbon are also necessary in large amounts, but are available to plants from the air and water.) The following are essential macronutrients:

  • nitrogen (N)–Promotes development of leaves
  • phosphorus (P)–Aids in growth of roots
  • potassium (K)–Helps plant resist disease
  • calcium (Ca)–Helps promote new root and shoot growth
  • magnesium (Mg)–Contributes to leaf color and helps absorb sunlight
  • sulfur (S)–Contributes leaf color
We called the company and was told that "not everything is listed." But given how weak the plants are, we are going to look for a calcium supplement to add. Calcium nitrate -- saltpeter, which I didn't manage to find when doing chemistry last year! -- seems to be what we need. We'll have to try the hydroponics shop again...

Tuesday, December 23, 2008

More Hydroponics - Sprouts

We've done a small side project to the hydroponics project. This one is about sprouts. It wasn't that hard to do since all that had to be done was rinsing the seeds. It took us about 5 days to do this project, and we managed to get great results. After using them up in sandwiches, we started another jar.

These are the sprout seeds, the bigs ones are radish seeds, and the smaller ones are alfalfa.


This is us setting up the jars, first we just some pantyhose to make the top of the jar, then we added water and the seeds and put them in the cabinet to dry.

Make a sprouter jar. (Source)
  1. Cut a piece of pantyhose or cheesecloth to fit over the top of a quart jar. It needs to be big enough to drape over the edge at least an inch or so.
  2. Keep it in place by stretching a rubber band around the outer edge of the jar. If it is a canning jar, you can also use the rim from a canning lid.


The seeds after they finished growing. We rinsed and dehulled them. Then we dried them and put them in bags to be eaten.

Sprout alfalfa or radish seeds (Source: SproutPeople.com)

1. Put 1 tablespoon of alfalfa sees or 3 tables of radish seeds in your sprouter jar. Cover by stretching your fabric over the top and fastening as described above.

2. Put jars someplace out of direct light where they won't be disturbed. Allow seeds to soak for 6-12 hours.

3. Drain off the soak water.

4. Rinse thoroughly with cool water. Drain thoroughly.

5. Set your sprouter anywhere out of direct sunlight and at room temperature between rinses. This is where your sprouts do their growing.

6. Rinse and drain again every 8-12 hours for 3 days.

7. Greening: On the 4th day relocate your sprouts to a brighter location. Avoid direct sun - it can cook your sprouts. Indirect sunlight is best but virtually any light will do. Experiment - you will be amazed at how little light sprouts require to green up.

8. Continue to rinse and drain every 8-12 hours.

9. Finishing: Your sprouts will be done during day 5 or 6. The majority of sprouts will have open leaves which will be green if you exposed them to light.

10. De-Hull: Before your final rinse remove the seed hulls. Transfer the sprouts to a big (at least 3-4 times the volume of your sprouter) pot or bowl, fill with cool water, loosen the sprout mass and agitate with your hand. Skim the hulls off the surface. Return the sprouts to your sprouter for their Rinse and Drain.

11. Harvest: Your sprouts are done 8-12 hours after your final rinse. After the de-hulling and the final rinse we need to drain very thoroughly and let our sprouts dry a bit. That will help them keep longer in the refrigerator. Let sit for 8-12 hours OR use a salad spinner.

12. Refrigerate: Transfer the sprout crop to a plastic bag or the sealed container of your choice.